How to Create a Custom Hatch Pattern in AutoCAD (PAT File Guide + Free Generator)
AutoCAD comes with dozens of hatch patterns, but sooner or later you need one it does not have: a particular brick bond, a tile module, a company standard or a symbol for a drawing legend. This guide shows how to create a custom hatch pattern in AutoCAD two ways, with a free online generator and by writing the PAT file yourself, and then how to load it in AutoCAD and Revit and fix the usual problems.
Quick answer
Create a .pat text file with a header line *NAME, description and one line per set of parallel lines, save it as NAME.pat in a folder on AutoCAD’s support file search path, then pick it under Custom in the HATCH command.
Skip the code: draw it instead
Draw lines and dots on a grid, see a live preview and download a ready AutoCAD or Revit .pat file. Free, no sign-up.
In this guide
What a PAT File Is
A hatch pattern is stored in a plain text file with the extension .pat. The first line names the pattern; every following line describes one family of parallel lines that repeats forever across the hatched area:
angle, x-origin, y-origin, delta-x, delta-y, dash-1, dash-2, …
| Value | What it does |
|---|---|
| angle | Direction of the lines, in degrees |
| x-origin, y-origin | A point the first line passes through |
| delta-x | How far each next line is shifted along its own direction. This is what makes offsets such as a brick bond |
| delta-y | Spacing between the parallel lines |
| dashes | Positive = draw, negative = gap, 0 = dot. No dashes = continuous line |
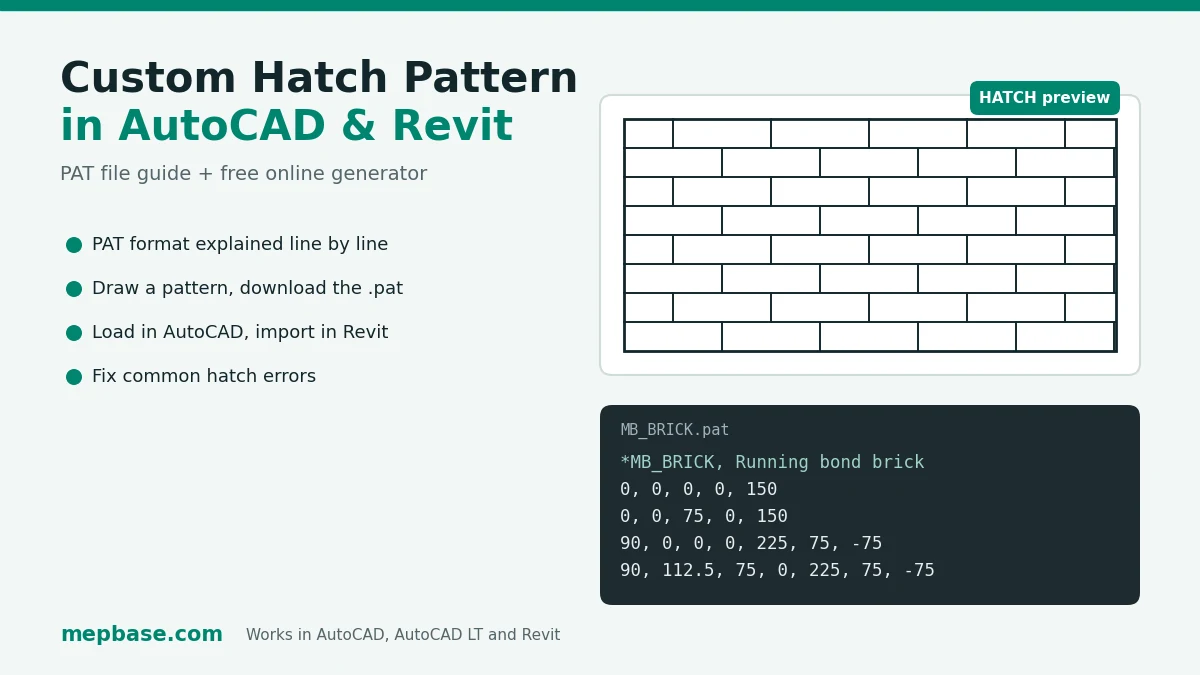
Here is a complete running bond brick pattern, 225 × 75 units, built from four line families:
0, 0, 0, 0, 150
0, 0, 75, 0, 150
90, 0, 0, 0, 225, 75, -75
90, 112.5, 75, 0, 225, 75, -75
The two horizontal families draw the bed joints 75 apart. The two vertical families draw the head joints, each 75 long with a 75 gap; the second family starts half a brick across and one course up, which creates the bond.
Method 1: Free Hatch Pattern Generator
Working out origins, offsets and dash lengths by hand is where most custom patterns go wrong, especially with sloping lines. The MEPBase generator does that part for you:
Choose a preset such as running bond brick, square tiles, basket weave or cross-hatch, or a blank grid.
Choose how many grid cells the repeating tile has across and up, and the size of one cell in drawing units. Cells can be rectangular, which suits bricks and planks.
Click two grid points to draw a line, use the dot tool for points and the eraser to remove items. The tile repeats in every direction as you draw.
The preview is drawn from the generated PAT data itself, so it shows exactly what AutoCAD will draw.
Type a pattern name, choose AutoCAD or Revit format and download. The file is named after the pattern automatically.
Why the generator is safer
Method 2: Write the PAT File by Hand
For simple patterns, writing the file yourself is quick. Open Notepad and build it one line family at a time.
Horizontal lines every 10 units
0, 0, 0, 0, 10
45° lines every 5 units
45, 0, 0, 0, 5
Dashed lines: 20 on, 10 off, rows 30 apart
0, 0, 0, 0, 30, 20, -10
Square tiles 300 × 300
0, 0, 0, 0, 300
90, 0, 0, 0, 300
Common mistakes when writing by hand
How to Load a Custom Hatch Pattern in AutoCAD
A pattern called MB_BRICK must be in a file called MB_BRICK.pat, and the file should contain only that one pattern.
Type OPTIONS, open Files → Support File Search Path, and copy the file into one of the listed folders, or add your own folder there.
Run HATCH, open the pattern list and choose it from the Custom patterns, or type its name.
If you drew the pattern in real units (for example millimetres in a millimetre drawing), use a hatch scale of 1.
Restart AutoCAD if the new pattern does not appear straight away. The same file works in AutoCAD LT. For ready-made patterns see our AutoCAD hatch patterns free download.
How to Import the Pattern in Revit
Revit reads the same PAT format but needs two extra lines: ;%UNITS=MM (or INCH) at the top and ;%TYPE=MODEL or ;%TYPE=DRAFTING after the header. The generator adds them when you choose a Revit format.
Model patterns stay a real size on the element (brick, tiles, cladding). Drafting patterns stay the same size on paper at every view scale.
Go to Manage → Additional Settings → Fill Patterns, choose Model or Drafting, click New, select Custom, then Import and pick the file.
With the units line set correctly the import scale should be 1.
Troubleshooting
| Problem | Fix |
|---|---|
| Pattern does not appear under Custom | The file name does not match the pattern name, the file holds more than one pattern, or the folder is not on the support file search path. |
| “Hatch spacing too dense, or dash size too small” | The hatch scale is too small for the area. Increase the scale, or raise the HPMAXLINES system variable for very large areas. |
| Pattern looks shifted or does not line up with walls | Set a new hatch origin in the Hatch Creation tab, for example the corner of the wall. |
| Lines are missing or the file will not load | A line longer than 80 characters, a missing comma, or a file saved as .pat.txt. Regenerate the file or check it in Notepad. |
| Pattern looks fine in AutoCAD but wrong in Revit | Missing ;%TYPE line or the wrong units line. Export again in a Revit format. |
Frequently Asked Questions
How do I create a custom hatch pattern in AutoCAD?
Write a .pat file with a header line *NAME and one line per family of parallel lines, save it as NAME.pat in a folder on the support file search path, and select it under Custom in the HATCH command. A hatch pattern generator can write the PAT lines for you from a drawing.
Where do I put custom .pat files in AutoCAD?
In any folder listed under OPTIONS, Files, Support File Search Path. You can add your own folder to that list so your patterns stay separate from the AutoCAD install.
Why is my custom hatch pattern not showing?
Usually the file name does not match the pattern name, the file contains more than one pattern, or the file is not in a support path folder. Notepad saving it as .pat.txt is another common cause.
Can I use AutoCAD hatch patterns in Revit?
Yes. Add ;%UNITS=MM (or INCH) at the top and ;%TYPE=MODEL or ;%TYPE=DRAFTING after the header, then import it under Manage, Additional Settings, Fill Patterns.
What does delta-x mean in a PAT file?
It is the shift of each next line along its own direction. Delta-y is the spacing between the lines. Delta-x is what creates offsets such as the half-brick shift in a running bond.