AutoCAD Advanced Commands, Tips & Tricks Every MEP Drafter Should Know
Most MEP designers learn AutoCAD by drawing — line by line, copy by copy. But the difference between an average drafter and a fast, professional one isn’t how much they draw; it’s how little they have to redraw. The right command at the right moment can turn a two-hour task into a ten-minute one.
This guide collects advanced AutoCAD commands and workflow tricks that matter most for MEP work — HVAC ductwork, piping, plumbing, fire-fighting, and electrical layouts. Learn even half of these and your drafting speed will jump noticeably.
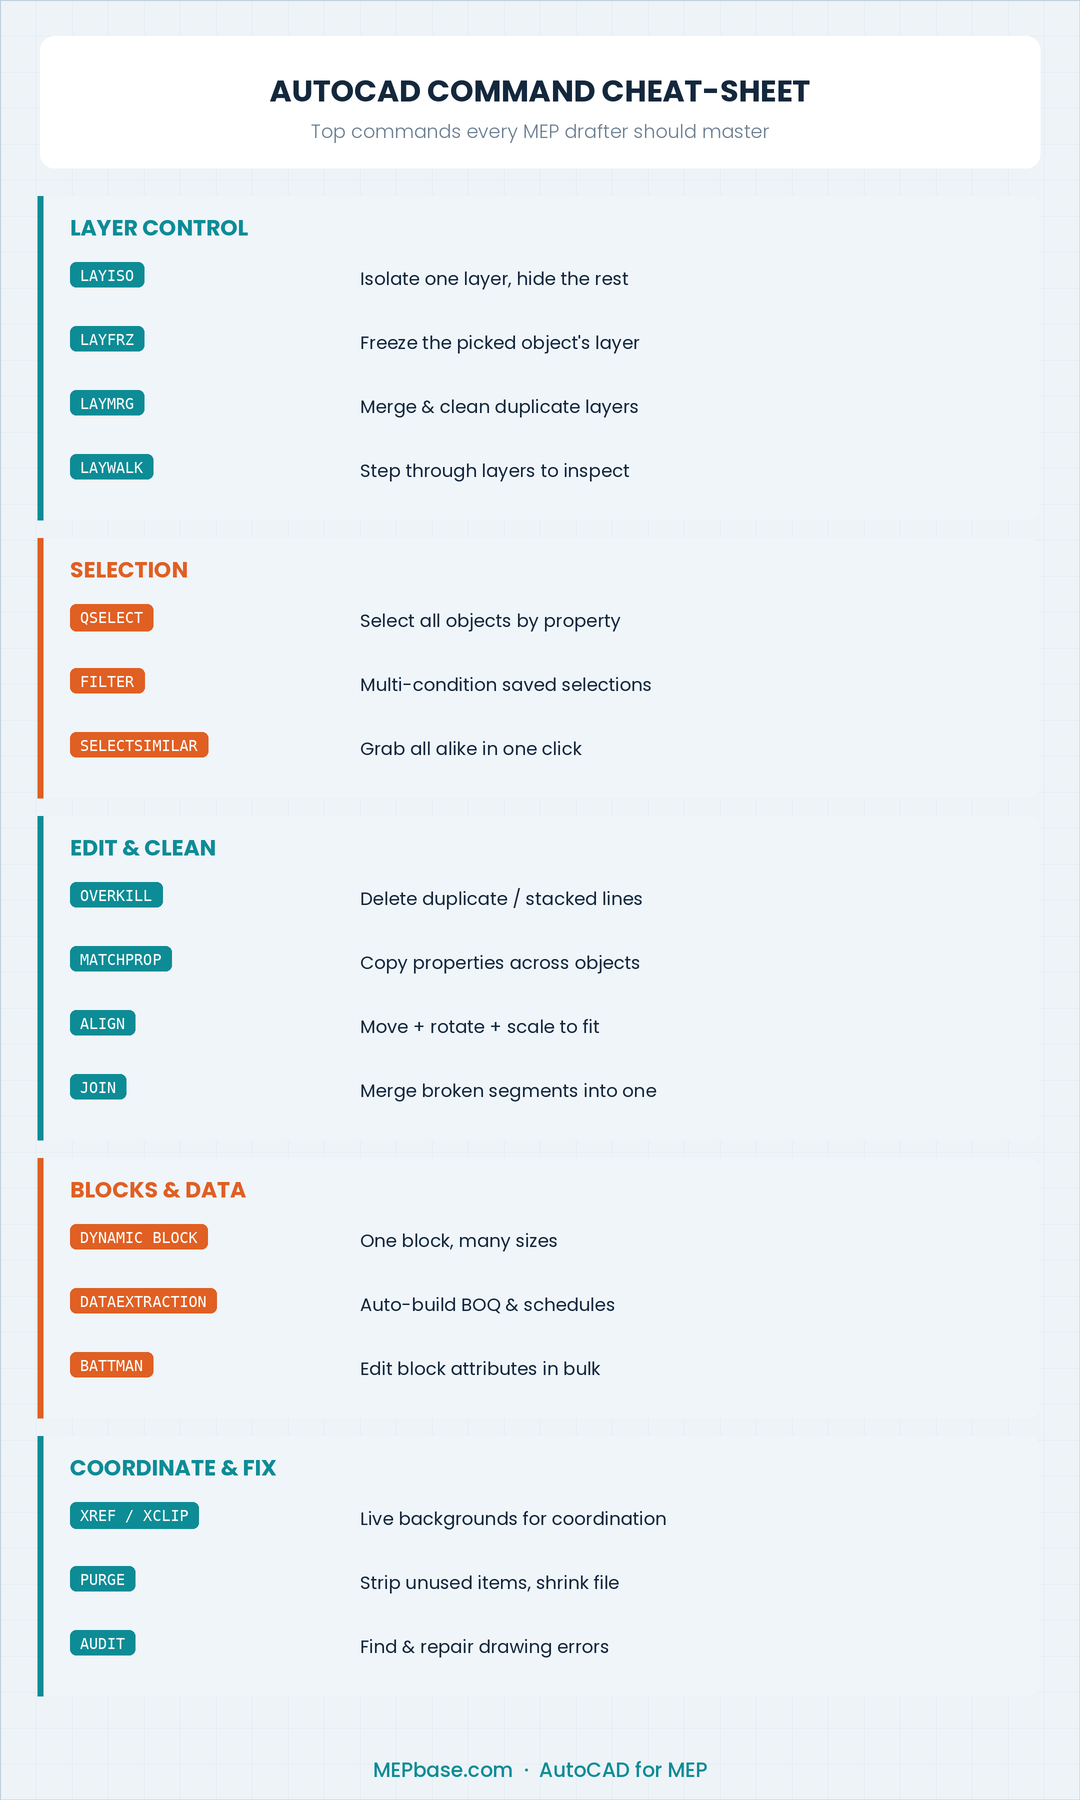
Save or print this cheat-sheet — the commands every MEP drafter should master.
1. Layer Control Commands (The MEP Lifesaver)
MEP drawings are layer-heavy. A single floor plan can carry the architectural background, structural grid, ducting, piping, drainage, electrical, and fire systems all at once. Mastering layer commands keeps that chaos manageable.
- LAYISO — Isolates the selected object’s layer and hides everything else. Perfect when you need to work on just the chilled-water piping without the duct layer getting in the way.
- LAYUNISO — Reverses LAYISO and brings every layer back.
- LAYFRZ — Freezes the layer of whatever you pick. Faster than hunting through the Layer Properties Manager.
- LAYWALK — Steps through layers one at a time so you can visually verify what’s on each. Great for checking a drawing you received from another discipline.
- LAYMRG — Merges one layer into another and deletes the empty one. Cleans up the dozens of duplicate layers that creep in from XREFs and pasted blocks.
- LAYMCH — Matches a selected object’s layer to a target layer (like Match Properties, but for layers only).
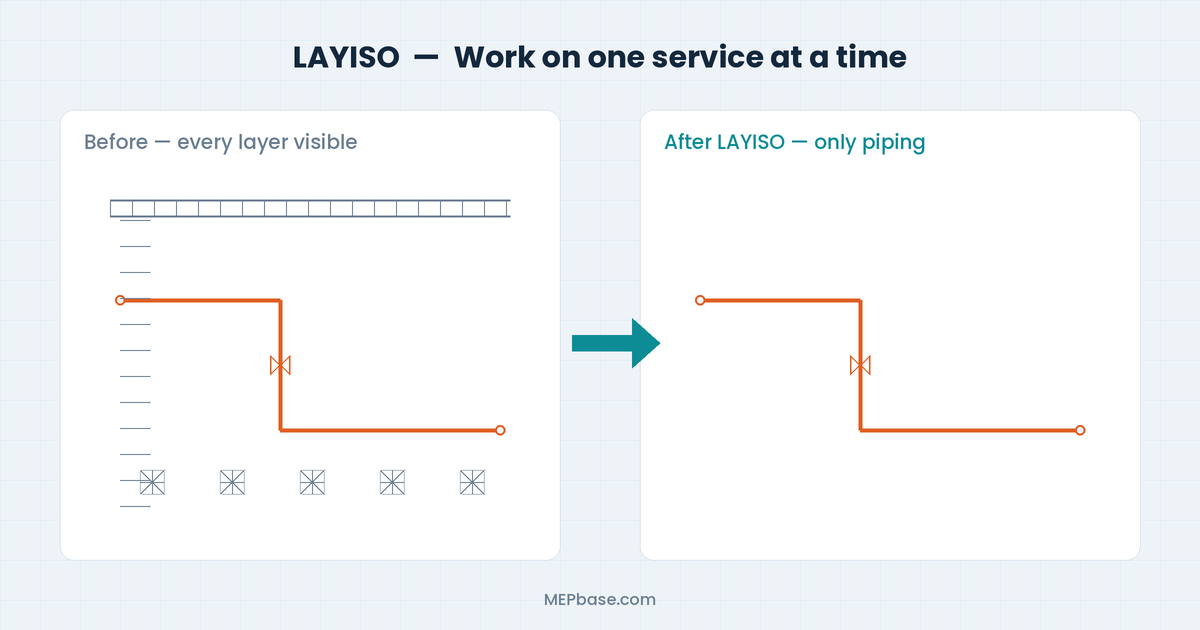
LAYISO isolates one service so you can edit it without distraction.
MEP tip: Set up a layer standard once (e.g.,
M-DUCT-SUPPLY,M-PIPE-CHW,E-LITE-CLNG) and save it as a template.dwt. Consistent layering is what makes coordination drawings and clash checks actually work. (See our full MEP CAD & layer standards guide.)
2. Selection Power Tools
Selecting objects one by one is where hours quietly disappear. These commands let you select smart.
- QSELECT (Quick Select) — Selects all objects matching a property: every object on a layer, every block named “VAV-BOX,” every line of a certain colour. Indispensable for editing duct fittings or fixture blocks in bulk.
- FILTER — A more advanced version of QSELECT with multiple combined conditions and saved filter sets.
- SELECTSIMILAR — Right-click an object and pick “Select Similar” to grab everything of the same type and properties in one click.
- Window vs Crossing — Drag left-to-right (window) selects only fully enclosed objects; right-to-left (crossing) grabs anything it touches. Knowing the difference saves constant re-selection.
3. Editing Commands That Save Real Time
- OVERKILL — Deletes duplicate and overlapping lines stacked on top of each other. MEP drawings imported from PDFs or merged XREFs are full of these. Run it and watch your file get cleaner and lighter.
- MATCHPROP (MA) — Copies properties (layer, colour, linetype, scale) from one object to others. Reformat a whole batch of mislabelled pipes in seconds.
- JOIN — Combines collinear lines, arcs, or polyline segments into a single entity. Useful for cleaning broken duct centrelines.
- ALIGN — Moves, rotates, and scales an object to match another in one operation. Great for dropping equipment blocks onto angled walls or rotated grids.
- STRETCH — Lengthens or shortens part of a layout (a run of duct, a corridor of cable tray) without redrawing it. Use a crossing window to grab the end you want to move.
4. Blocks, Attributes & Dynamic Blocks
Blocks are the backbone of MEP libraries — diffusers, VAV boxes, fixtures, light fittings, valves, dampers.
- Dynamic Blocks — Add parameters and actions so one block can flex into many sizes. A single dynamic duct-transition or a stretchable cable tray beats keeping 20 near-identical blocks.
- ATTDEF / ATTEDIT — Define and edit attributes (text fields tied to a block). Use them to carry data like equipment tag, capacity, or flow rate.
- BATTMAN — Block Attribute Manager; edit attribute definitions across all instances at once.
- WBLOCK — Writes a block out to its own
.dwgfile so you can build a reusable MEP component library.
MEP tip: Put meaningful attributes (tag, CFM, kW, GPM) on your equipment blocks now — it pays off when you extract schedules later (see the next section).
5. Data Extraction — Auto-Generate Your BOQ & Schedules
This is one of AutoCAD’s most underused features in MEP, and it’s a game-changer.
- DATAEXTRACTION (DX) — Walks you through a wizard that counts blocks and pulls their attributes into a table or Excel file. Instead of manually counting 340 light fixtures or every diffuser, let AutoCAD count and tabulate them. Update the drawing, refresh the table, and your quantities stay accurate.
Pair attributed blocks with data extraction and you’ve automated half of your equipment schedule and BOQ. (New to bills of quantity? Read our step-by-step MEP BOQ guide.)
6. External References (XREF) — The Coordination Backbone
MEP never works in isolation. You overlay your services on the architect’s and structural engineer’s backgrounds.
- XREF / XATTACH — Attach another discipline’s drawing as a reference instead of copying it in. When they update their file, yours updates too.
- XCLIP — Clips an XREF so you only see the portion you need (e.g., just one zone of a large plan).
- Overlay vs Attach — Use Overlay for backgrounds you don’t want carried into other people’s nested references; use Attach when nesting should pass through.
- -XREF → Bind — Binds an XREF into your drawing when issuing a final, self-contained file.
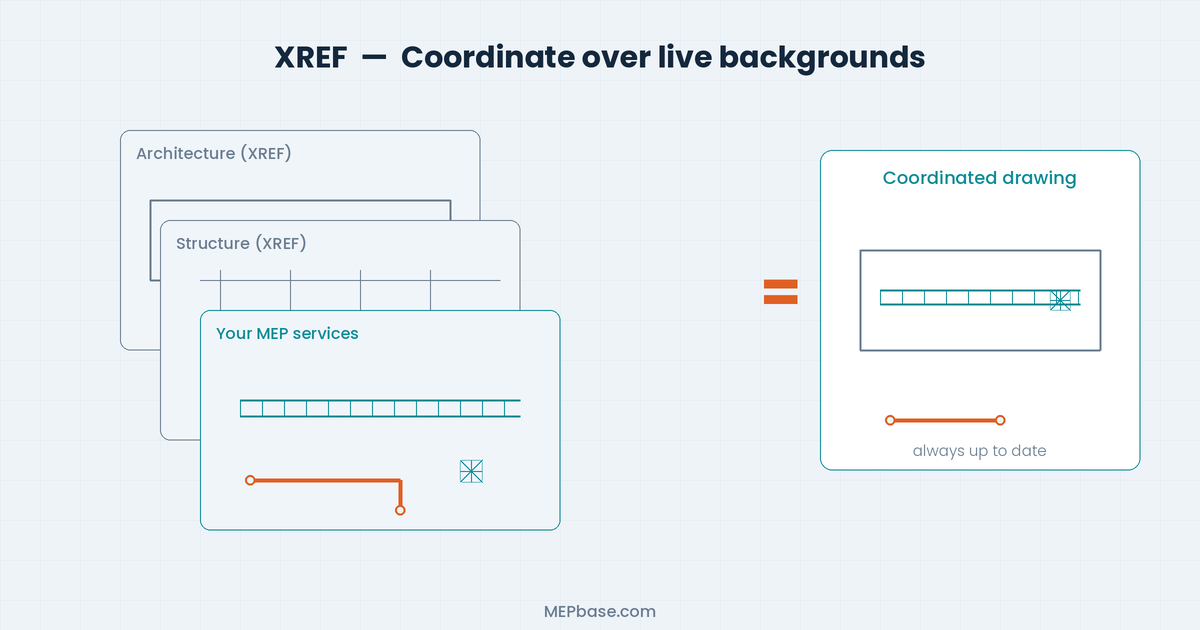
XREF lets you draft your services over live, always-current backgrounds.
MEP tip: Keep your title block, grid, and background as XREFs. It keeps your service drawing light and guarantees you’re always coordinating against the latest architecture. Wondering when to move to BIM instead? See AutoCAD vs Revit for MEP.
7. Express Tools You’ll Actually Use
AutoCAD’s Express Tools menu hides several gems:
- TEXTMASK — Puts a clean background behind text so it’s readable over hatching or busy duct lines.
- TCOUNT — Auto-numbers text or tags sequentially. Handy for numbering rooms, fixtures, or equipment.
- BURST — Explodes a block but keeps the attribute values as plain text (normal EXPLODE turns them back into tags).
- Flatten — Cleans up Z-axis values, which fixes the “object snaps don’t work right” problem in messy imported files.
- MOCORO — Move, copy, rotate, and scale in a single command.
8. Productivity & File Health Commands
- PURGE (PU) — Removes unused layers, blocks, linetypes, and styles. Shrinks file size and clears clutter.
- AUDIT — Finds and fixes errors in the drawing database. Run it when a file is acting strangely or won’t open cleanly.
- RECOVER — Repairs and opens a corrupted
.dwg. - -PURGE → Regapps — Clears junk application data that bloats files passed between many programs.
- Workspaces (WSSAVE) — Save your custom toolbar and panel layout so your MEP setup is one click away.
9. Custom Aliases — Type Less, Draw More
AutoCAD lets you rename command shortcuts via the PGP file (acad.pgp, edited through Express Tools → Command Alias Editor). Map your most-used MEP commands to two-letter combos you can hit without looking:
CP→ COPYDI→ DISTXL→ XLINELI→ LIST
A handful of custom aliases save thousands of keystrokes a week. (Grab our full AutoCAD shortcuts cheat-sheet to go further.)
10. Drawing Setup Tips That Prevent Headaches
- Use ANNOTATIVE scales for text, dimensions, and hatches so they print correctly across multiple viewport scales (1:50 plan and 1:20 detail from the same objects).
- Set up Page Setups & Layouts properly — keep model space for drawing and paper space (layouts) for sheets, title blocks, and plotting.
- Standardize Plot Styles (CTB/STB) so line weights are consistent across the whole project team.
- Lock your viewports after setting the scale so a stray scroll doesn’t shift everything.
Final Thoughts
You don’t need to memorize every command in AutoCAD. Pick five from this list that hit your daily pain points — maybe LAYISO, OVERKILL, QSELECT, DATAEXTRACTION, and XREF — and use them until they’re muscle memory. Then add five more.
In MEP, drawings are constantly changing as coordination evolves. The drafters who thrive aren’t the ones who draw the fastest; they’re the ones whose drawings are easy to change. Clean layers, smart blocks, live XREFs, and automated schedules are what make that possible.
Master these, and you stop fighting AutoCAD — you start using it the way it was meant to be used.
Found this useful? Bookmark it and share it with your drafting team. For more MEP design, drafting, and BIM resources, keep following MEPbase.com.